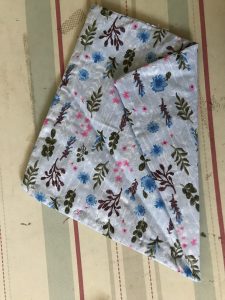
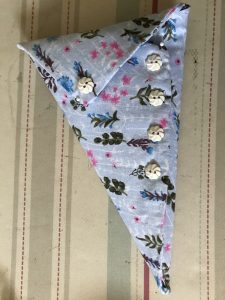
Recently we held a “Craft Evening” at Southend Sisters Women’s Institute. This is always a challenge to the Leader who has to figure out just what may be achieved in a couple of hours. Member Shirley showed us how to stitch a “Scissor keeper”. Most of us can sew. We had been to school back in the day when sewing was on the curriculum. Shirley handed out fabric squares that she had already machine stitched together. A “sandwich’ of outer fabric, lining and wadding which needed to be turned right side out. Of course a couple of members managed to get in bit of a muddle. But it was so easy to pull through the layers so that the wadding was still on the outside, not tucked neatly inside. Now came the next challenge; threading the needle. This is where “needle threaders” come in handy – either the person next to you or those little wire devices. After stitching the join closed we had to embellish the front of the keeper with buttons. There was an amazing selection of buttons to choose from. Then the square had to be folded into three and stitched to make a cone shape before adding a press stud to keep it closed. There was plenty of time to finish the keeper but I decided to take mine home to give it a good press with my steam iron. Everyone who watches the “Great British Sewing Bee” knows how important it is to sew with an iron handy. Easy enough for the TV Programme organisers but well-nigh impossible to arrange at a WI Meeting because of all the electrical safety requirements.
Meanwhile, this month Westcliff-on-Sea Women’s Institute held a “Jubilee Craft Competition” as part of their celebrations. I wracked my brains for something “easy” to make. Ahah! A red, white and blue scissor keeper. That immediately elevated my task from “easy” to “complicated” because it required joining patch work strips to create the required square of fabric. I found Union Jack fabric at Kayes Textiles so I used that instead of white. And I won! The trophy is mine for twelve months.
How to Sew a Scissor-Keeper.
- Measure the length of your scissors and add an inch/ 2.5cm for turnings and “ease”
- Cut out squares of fabric, wadding and lining with the side that length
- Machine stitch the squares together with a quarter inch/6mm seam leaving 3”/ 7.5cm open for turning the keeper right-side-out
- Trim wadding close to stitching. Trim corners. Turn right side out.
- “Roll” seam and tack then press edge firmly with steam iron.
- Neatly slip stitch the opening to close it.
- Top stitch edges on sewing machine.
- Place fabric square on table so that one corner points down. Fold over the right hand corner about one third then fold in left hand corner on top to make a cone shape. Press firmly.
- Open out the “cone” and embellish the front one third as required.
- Close the cone once more and slip stitch it closed
- Sew a press stud fastener onto the top flap and the onto main cone to hold the keeper shut.
- Place scissors inside.


 Follow
Leave a Reply